The wind wings were left off and the mirrors were removed from the windscreen. The wind wing hinges were refitted to the windscreen.
 |
| Side screen with guide to cutting |
5mm Perspex sheet was used for the side screens. This had guidelines drawn on it by GD - note that it says ‘guide only’. The cutting will depend on how you
have installed the hood, so the cut line WILL be different from the lines GD have drawn, unless you are very lucky.
The Perspex was cut, using a slow speed on the jig saw, replicating the screen rake angle, but allowing an extra 3mm clearance for the hood bow. The front edge of the side screen almost touched the windscreen frame. The bottom edge of the side screen was set about 13mm from the door top, to allow for the rubber seal - I used a piece of wood taped to the door to space the side screen from the door. The bottom rear part of the side screen was also cut to create a 13mm gap to the door at this stage. The side screen was temporally taped in place.
 |
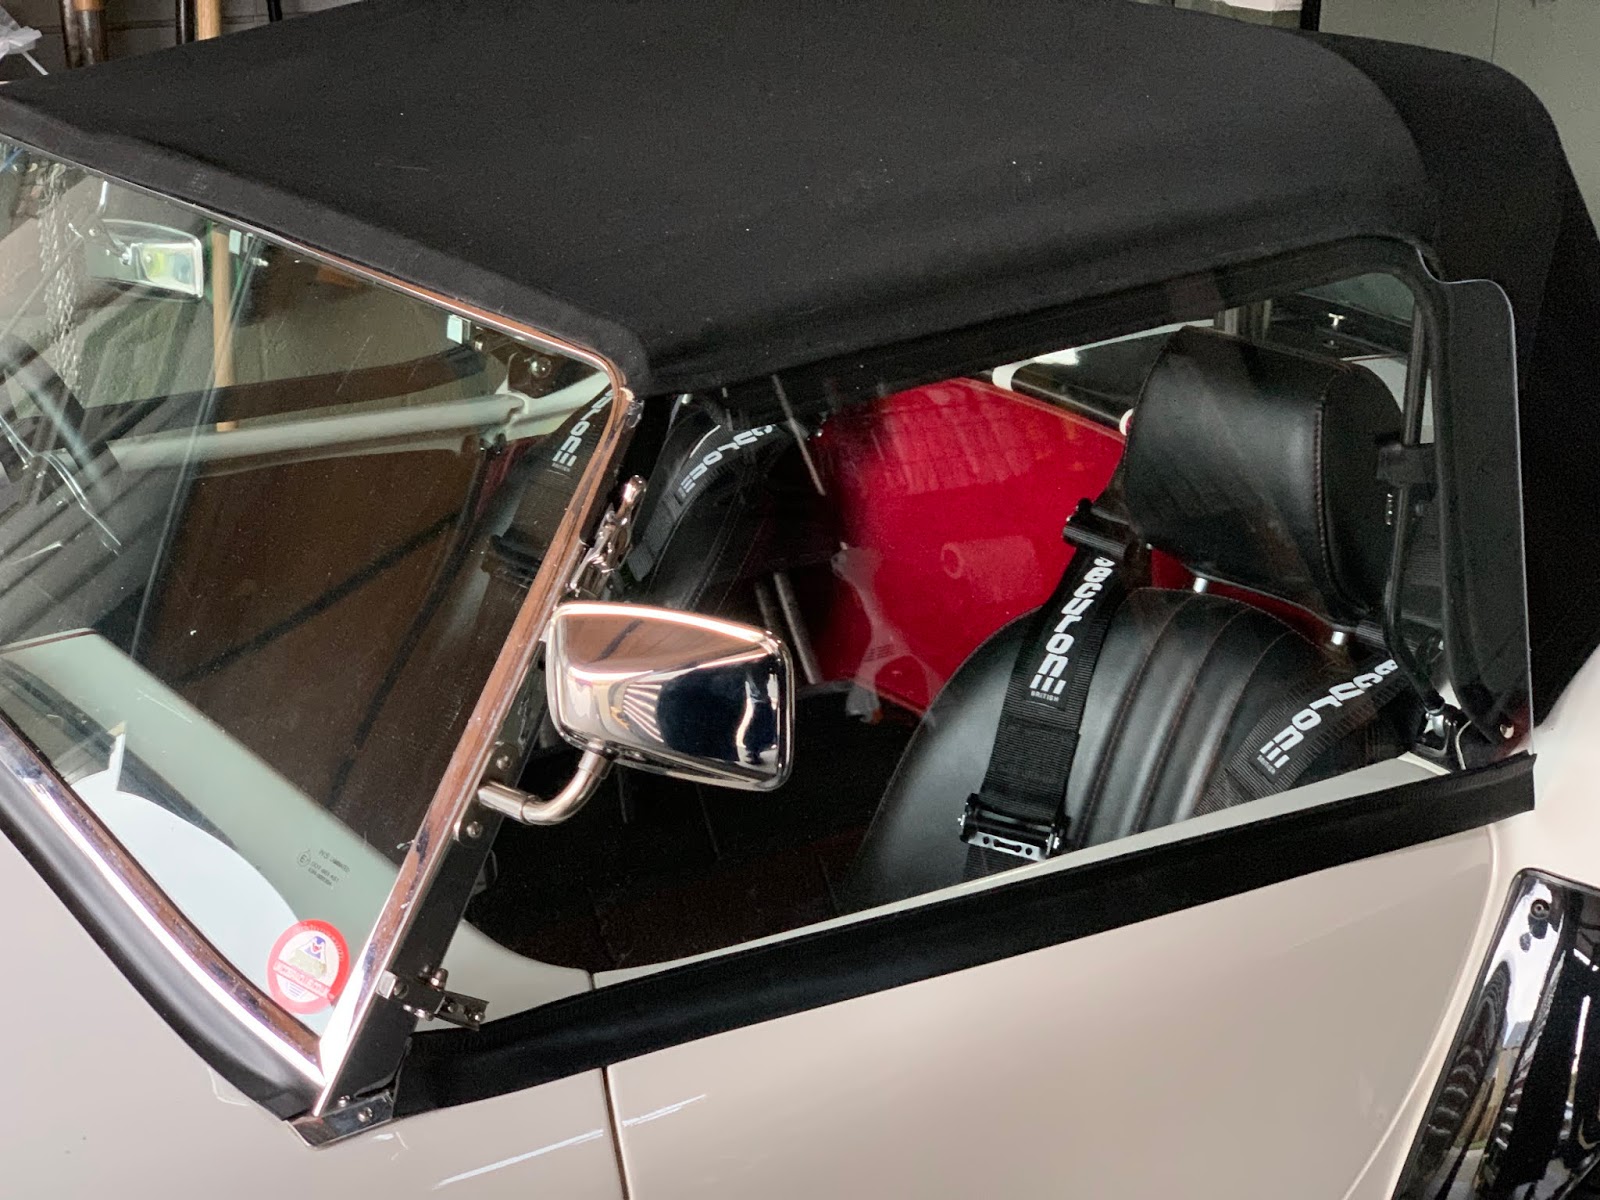
Side screen temporarily fixed with tape and hinge. Note the tape on the doors holding the wooden spacer |
Holes were then drilled to mount the side screen to the hinges and these were temporarily secured in place to make sure that the cut was right. No seal was required between the side screen and windscreen.
 |
| Side screen hinge |
Next the top stitching was used to help mark the top of the side screen, so that it could be tucked under the lip of the hood when closed. The factory markings on the Perspex were incorrect for my screen. So after numerous measurements and remarking, the cut was made. This was a time consuming job. An “S” transition was used at the top rear to create an overlap of roughly 70mm to the rear (screen to hood) to allow rain etc to be blown off to the rear.
 |
| The correct cut line is the thinner line near the top, so DO NOT cut to the line drawn. As it says it is a guide only. |
The Perspex was removed and cut to shape. The side screen is flat, so does not follow the shape of the car - it sticks out a little at the bottom rear, but being Perspex there is some flexibility here. So it will need fixing at the rear to pull it into shape. This will also stop the side screens lifting when the hood is in place or when the screens are used without the hood.
GD recommend a turn catch that bolts through the side screen and turns behind the elbow of the hood frame, but this limits the side screen use to times when the hood is up! The bottom of the screen cannot be fixed to the door top, otherwise the door will not open (due to the windscreen angle). So I have yet to decide how to fix them - possibly a turn lock that goes behind to door top or some Velcro that goes from the side screen to the top underside of the doors.
The edges of the Perspex were sanded smooth, then polished with a fine body compound, before the rubber seal was worked into place on the bottom edge. Here I applied a little Vaseline to the rubber seal and then worked it into place. Patience and some strength is required here! Finally, clear anti-scratch film was applied both sides (inside and out), at the top of the side screen (tucked in edge only), to prevent scuffing when used. The screen was then refitted to the car.
 |
| Here you can see the bottom rear sticking out, until a catch is fitted |
 |
| Side view |
View from front
This process was then repeated on the other side of the car.
I decided to use ‘glove box’ locks for the side locks. A hole was cut in each side screen to the ‘across flats’ size of the lock barrel, then filed to a square to take the locking mechanism. This stops the lock turning in the sidescreen.
The side screen catches were next. First I removed the existing catch part and made up a longer catch from aluminium bar. This was cut so that 50mm was extending towards the door top and 65mm to the other side (115mm in total). Shrink wrap was applied to the longer side to act as the handle. A square hole was cut as the pivot 50mm from the short end, before attaching to the lock (see below).
 |
| Catch made to fit lock. |
Next the catch position was marked onto some masking tape on the top of each door. The slot size was marked from the escutcheon (I used the bulkhead escutcheons from GD) onto the tape and the screw positions marked. A slot was then cut with the Dremel. After filing out the slot a little, the masking tape was removed and the escutcheons fitted in place using two screws.
 |
| ‘Bulkhead’ escutcheon one door top |
Finally the side screens were re-attached and the catch positions checked.
 |
| Screen in place with catch |